
How to Shape Your Artificial Trees & Plants
How to Shape Your Artificial Trees & Plants
The first introduction many of us have to artificial plants is our Christmas tree and, if you’ve ever shaped an artificial Christmas tree (more on that later), you have an insight into how to approach your year-round artificial decorative plants. Here’s an overview of what to expect.
Shaping Artificial Trees and Plants
Once you know what you are doing, shaping artificial trees and plants is easy and will ensure they look at their absolute best. Don’t confuse ‘easy’ for ‘quick’, though – in some cases this will require a bit of time to get the best results.
Unpack the plant
Most plants will arrive in an oblong box, which is great for transporting them but definitely not plant-shaped. Similar to your Christmas tree when it’s packed away, all the branches and leaves are smoothed out and laid flat, to save on the room needed for packing and also to protect the plant during transit.
Once you’ve got into the box – and if you’re cutting through tape with a knife or scissors, take care not to damage the plant inside – remove any packing material. Now take hold of the pot, which is the heaviest thing. If the plant is tall, you probably also need to take hold of the trunk or stem at about the halfway point, to help support it. Lift it out of the box and place it on a level surface. Depending on how tall your plant is, this will be either be a table or the floor, and the weighty pot will give it stability.
If the plant is wrapped in protective material, such as plastic, remove that now. If you ordered, for example, a six-foot tree, it’s unlikely to come in a six-foot box, so the top section will have been folded over. If that’s the case, straighten that out so the tree stands tall. If any of the branches have become twisted, straighten those out, too.
Start at the base
At this stage, your plant won’t look much like the one you ordered, but don’t worry – it soon will.
Whatever the type of plant, always start at the base and work your way up.
For a leafy plant, like a zebra plant, for example, start to pull the outer stems away from the main ‘trunk’. At this stage, the leaves of your plant are going to be flat. Natural leaves generally aren’t flat, they are curved. To shape large leaves, hold the tip in one hand and run the index finger of the other hand from tip to stem, curving and shaping as you go. Large leaves include wire, so will hold the shape.
Remember that the leaves at the bottom of a plant often have more of a curve than those at the top, so shape accordingly.
For a tree, pull branches away from the trunk, and ease the individual twigs and sprigs away from each branch. The branches of, for example, ficus trees are slightly curved, so shape them accordingly. When you’re happy with that, position the leaves, so they are spread out. Make sure your main trunk remains upright when you’re rearranging branches, otherwise it will look uneven.
You can be firm when shaping your plant, but don’t be too rough. It’s better to manipulate a leaf or a branch two or three times and gradually get the shape you want than try to get it done in one go and damage it.
If your plant has silk leaves or flowers that are creased, then playing a hairdryer on a cool setting over them will help the creases to drop out. Don’t blast full heat on the same area – that can cause damage – choose a low setting and keep the heat moving.
Check from all angles
When you’ve finished shaping your plant, rotate it or move round it to check it looks full and well-shaped from every angle. If anything needs tweaking, you can do that now.
Finishing Touches
Once your plant looks at its stunning best, it’s time to think about how you present it. Where will you put it? What will you put it in? How will you add those finishing touches? Let’s look at some options.
The right pot
A big element of presentation for any plant is the container it is put in. Plants are generally delivered in a small, plain pot, but when it comes to fancy decorative pots, there’s so much to choose from, including ceramic, wood, terracotta and basketwork.
It’s important to match the pot and the plant. If you have a large terracotta pot, then it needs a suitably sized plant. Similarly, a large plant would look silly in a too-small pot.
If you have a good-sized plant but find a third of the height disappears when you stand it in its lovely, deep decorative pot, here’s what to do. Get some foam, either florists’ or polystyrene, and place it in the bottom of the pot. Make sure it’s level and stable, then lower your plant in. Now the top of the smaller pot is much nearer the top of the decorative pot, and you can see all of your plant. Cut some smaller pieces of foam and tuck them in around the smaller pot to keep the tree in place.
Toppings and dressings
Once your plant is shaped and in the right pot, you can consider how to dress the ‘compost’. There might be some decorative fake moss around the base and if you’ve chosen a fancy pot that’s just big enough, that might be all you need.
However, if you want to do more, there’s a variety of options and your choice can be used to complement the plant, the pot, the rest of your décor, or all three.
If you have chosen a larger urn for a tree, for example, you might want to fill the whole thing with something like bark chippings, so it looks like the tree has been planted in that pot. Alternatively, you could go for a brightly decorated pot and a decorative gravel – brilliant white, rich gold, or any of the other jewel colours that are available.
If the scale of the pot and plant is big enough to take it, you could go for pebbles rather than gravel – or else use gravel as the base and add a few decorative pebbles as a contrast. Keep them natural, or encourage the kids to decorate them for a personal touch. Another option is glass pebbles, either in a single colour or a rainbow mix.
And, taking us right back to the start of this section, you could add a layer of fake moss.
At this stage you might be thinking that a big pot filled with gravel or pebbles is going to be heavy, and the amount of material it would take to fill it up would be ridiculous. And you’d be right.
Here’s where leftover packing materials – either from your plant or from other parcels you received – comes in handy. Once the plant is positioned in the pot – and you can use polystyrene or additional packing material to make sure it won’t shift about – simply fill the remaining space with packing paper, newspaper, or even bubble wrap. That way, you aren’t adding unnecessary weight and you only need add a shallow layer of finishing materials to achieve the desired effect.
The right spot
Because many of the parts of the plant – branches, stems and leaves – contain wire, you can shape them and style them as you please. If you have a big space, you can move the branches further from the trunk to fill it. If you have a narrower space, you can keep the branches closer together.
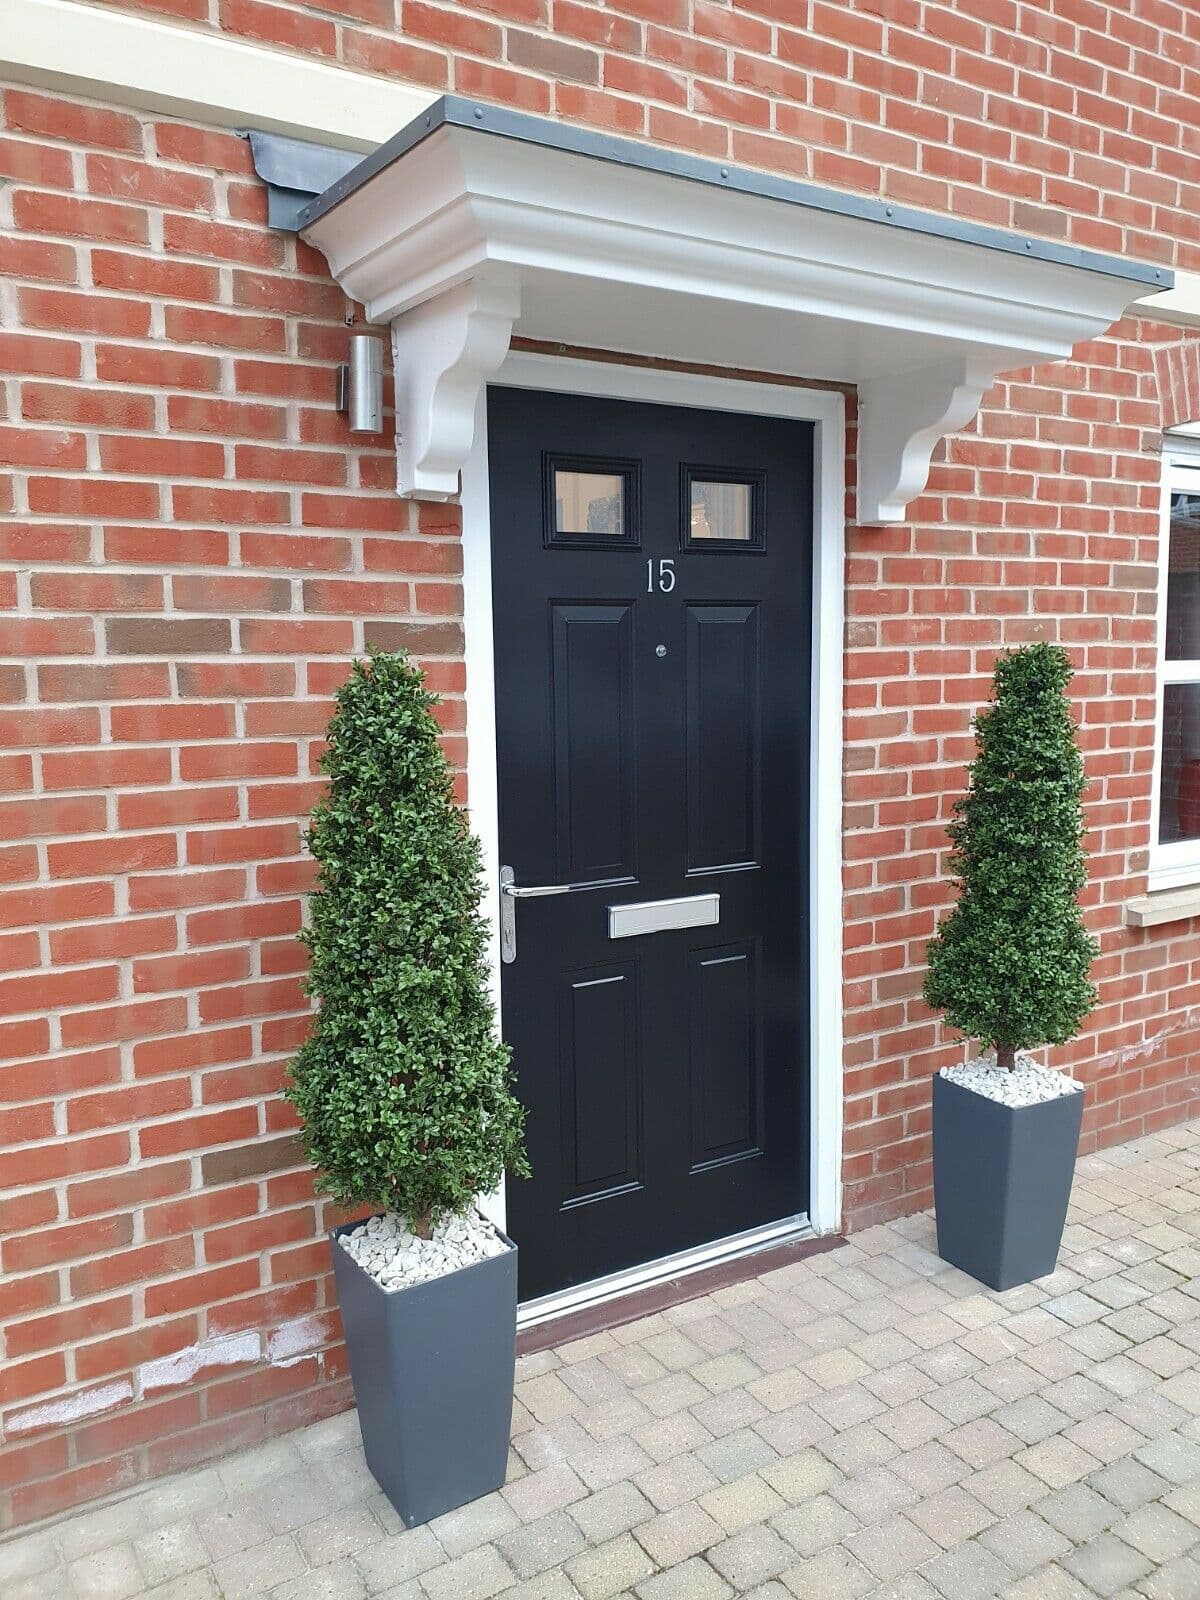
A big advantage of artificial trees and plants is that you don’t need to worry they have a spot that’s too bright for them or so shady the plant withers away. You can put your plant pretty much exactly where you want it. If you want brighten up a dull corner, a miniature rose might be perfect; if you want to add interest to a plain wall, then a series of plants on shelves, or wall-mounted baskets should do the trick. A flowering tree in the conservatory, a fruit tree in the kitchen or a leafy areca palm in the dining room would all look fantastic. Some fancy topiary or a bay laurel by the front door or on the patio would be perfect.
One thing to watch for; even though these plants come with UV protection, if they spend many hours in direct sunlight – indoors or out – then the colour might be affected. Other than that, put them wherever you want them.
Lights and lighting
Your miniature rose in its dull corner might be even more attractive if it’s lit in some way. Think stick-on overhead LEDs if it’s under a shelf, or mini spotlights, or a table lamp nearby that catches the plant in its circle of light.
Tall plants and trees might benefit from spotlights, or a nearby standard lamp or tall uplighter could help mirror the shape.
You can also, depending on the plant, add fairy lights. They don’t just look good on the Christmas tree! They can enhance the look of pretty much anything – topiary, decorative trees, flowering plants and even hanging baskets. Battery operated lights offer added flexibility.
About That Christmas Tree …
We mentioned them right at the start and it’s fair to say – like other artificial plants and flowers – they have changed dramatically over the years. Whereas we may have started out with trees that stood three to four feet high, had uniform green foliage, and came fully assembled – they just needed the branches to be pulled away from the trunk – there are now very many different types and sizes to be had. There are short trees that look good on a table top, slender trees for smaller spaces and huge, tall trees for those with enough floor space and ceiling height to accommodate them.
Some do still come in one piece, but many others have to be built up, branch by branch, tier by tier, until finally the crown completes the tree.
Leaving aside the wide variety of colours – white, black and everything in between – fake Christmas trees are becoming so natural-looking that it can be hard to tell the difference between them and the real thing. One giveaway is that while real trees can have gaps in foliage and even a flat side, depending on how and where they were growing, artificial Christmas trees are a pleasing, uniform shape, perfect for decorating. Provided, that is, they are assembled correctly.
How do you assemble a Christmas tree correctly? Well, first make sure the branches will be added in the correct order, so you get the right overall shape. Second, as you attach each branch, you need to shape it so that the foliage looks full. Starting with the sprigs at the back, pull out one each to the left and right, and stand the third upright. When it comes to the front of the branch you may have more detailed sprigs, so make sure they are all separated to give a lush, full effect. Pull the sprigs of the crown down so that you can’t see the gap where the tiers of branches end and the top section begins.
Oh – and a pro tip, especially useful if you aren’t able to easily walk all the way around your tree: with an artificial tree, you can add the lights as you go. Attach the bottom row of branches; add the lights. Attach the next row of branches; add the lights. It makes getting the lights evenly positioned and all the way round the tree an absolute breeze, and the job feels more than half-finished when the tree is assembled. Just make sure you have a long enough set of lights, so you can be confident they reach to the top!
Conclusion
Artificial trees and plants come in a wide variety of shapes, styles and colours, and can be a welcome addition to any home or garden. They look stunning all year round, whatever the weather or however much time you have free, and effortlessly dress a room, patio or other outdoor space.
The trick, as with so many things, is putting a little time and effort into making sure they are properly presented. In the same way as you take time to set a table, drape the curtains or position pictures on a wall, you need to take a little time to shape your new faux botanicals. The beauty of them is, once you’ve done that, they stay looking perfect.
If you’re thinking about investing in some artificial plants – or waiting for some to be delivered – you might want to bookmark this page to come back to for a little guidance and inspiration. And even if you’re reading this at the height of the summer, you might want to bookmark it for the Christmas tree tips, or as a reminder to pick up a gorgeous silk poinsettia that won’t suddenly drop its leaves on Christmas morning!
If you have any questions about artificial plants and trees, or want to tell us about ones you’ve invested in, leave us a comment. We’ll try and answer your questions and we always love hearing about how artificial plants are being enjoyed.
Leave a comment